Fiberglass nail extensions are one of the most underrated options in nail enhancement. They are not as famous as acrylics or hard gels, but they offer something many clients and technicians value: a thin, natural-looking extension that is surprisingly strong and flexible. If you want length without the thick, heavy feel of traditional acrylics, fiberglass is worth understanding.
What Are Fiberglass Nail Extensions?
Fiberglass nail extensions are a nail enhancement technique that uses fine fiberglass mesh combined with a resin or gel system. The fiberglass mesh is layered over the natural nail or over a tip or form, then saturated with resin. When the resin dries or cures, it hardens around the mesh, creating a strong but lightweight shell.
The technique is related to silk wraps and fiber wraps. Silk and fiberglass wraps are often used to repair cracked nails or to strengthen natural nails. When extended over a tip or form, the same materials can create a full extension. The result is a thin, semi-flexible enhancement that looks more natural than many acrylic systems.
There are two main versions. Traditional fiberglass systems use an air-dry resin and activator, similar to nail glue but stronger and more flexible. Modern fiberglass gel systems use a UV or LED gel resin that cures under a lamp. Both can be used for extensions and overlays.
The Benefits of Fiberglass Nail Extensions
Fiberglass extensions offer several advantages over acrylics and hard gels.
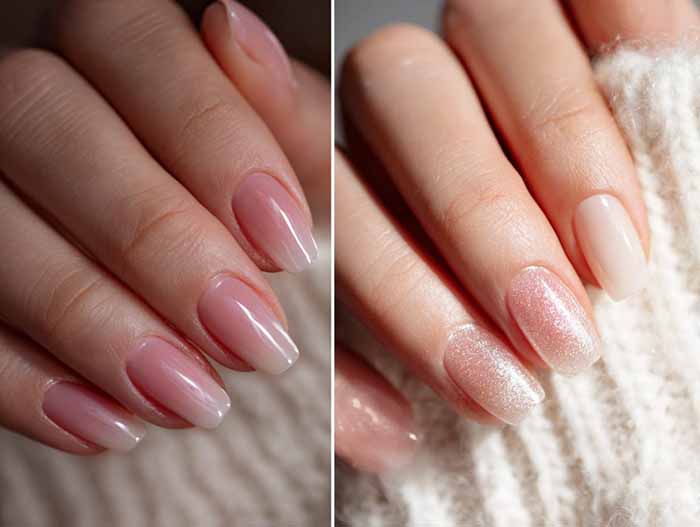
Natural appearance. Fiberglass is very thin. It does not look bulky or artificial. The mesh is translucent, so it blends well with the natural nail. When finished with a sheer or nude polish, the result looks like healthy natural nails.
Lightweight feel. Acrylics can feel heavy, especially on longer extensions. Fiberglass is much lighter. Clients often say it feels like they are not wearing extensions at all.
Strength with flexibility. Fiberglass is strong, but it is also slightly flexible. This means it can bend with the natural nail instead of snapping. For clients with thin or flexible nails, this reduces the risk of breaks.
Good for repairs. Fiberglass mesh is excellent for repairing cracked or split nails. It can hold a break together while the nail grows out.
Less filing damage. Fiberglass extensions usually require less aggressive filing than acrylics. This means less stress on the natural nail plate.
Soak-off options. Many fiberglass gel systems are soak-off, meaning they can be removed with acetone. This makes removal gentler than filing off hard gel or acrylic.
Breathable feel. While no enhancement is truly “breathable” in the biological sense, fiberglass is thin and does not trap moisture the way thicker acrylics can. This can be more comfortable for some clients.
What You Need to Create Fiberglass Extensions
The exact supplies depend on whether you use a traditional resin system or a UV/LED gel system. Here is a general list.
- Fiberglass mesh. Fine fiberglass strips or sheets. You cut them to size for each nail.
- Resin or gel. Traditional systems use an air-dry resin and activator. Gel systems use a UV/LED fiberglass gel.
- Nail tips or forms. Tips are pre-shaped plastic extensions glued to the free edge. Forms are paper or metal guides placed under the nail for sculpting.
- Nail glue. For attaching tips if you are using them.
- Primer and dehydrator. To prepare the natural nail for adhesion.
- Cuticle pusher and nippers. For prep.
- Small scissors. For cutting the mesh.
- Application brush. For applying resin or gel.
- Nail files and buffers. For shaping and blending.
- UV/LED lamp. If you are using a gel system.
- Top coat. For a glossy finish.
- Cuticle oil. For aftercare.
How to Create a Perfect Fiberglass Extension?
Step 1: Prepare the natural nail. Remove old polish. Shape the nail and push back the cuticles. Lightly buff the nail surface to remove shine. Wipe with a dehydrator or alcohol. Apply primer if your system requires it.
Step 2: Apply a tip or form. If using a tip, select one that fits the nail width. Glue it to the free edge and blend the seam. If using a form, slide it under the free edge and align it with the natural curve.
Step 3: Apply the first resin layer. Brush a thin layer of resin or fiberglass gel over the natural nail and the tip or form. Do not cure or dry yet.
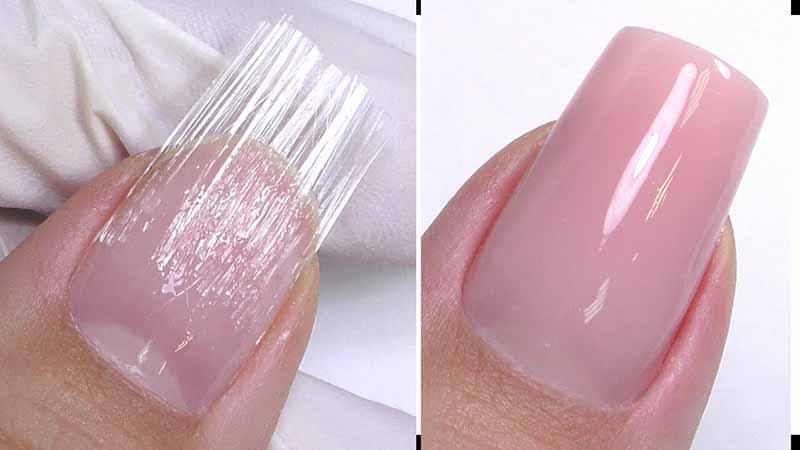
Step 4: Lay the fiberglass mesh. Cut a piece of mesh slightly larger than the nail. Place it over the wet resin. Press it down gently so it saturates. Use your brush to smooth it flat. Avoid wrinkles and air bubbles.
Step 5: Add more resin. Apply another layer of resin over the mesh. Make sure the mesh is fully saturated. If using a gel system, cure under the lamp. If using an air-dry system, wait for it to set.
-1024x1024.jpg)
Step 6: Build the structure. Add another layer of mesh if you need more strength. Repeat the resin and mesh steps. For extensions, build the apex—the thickest point—slightly forward of the center. This provides strength.
Step 7: Cure or dry fully. Follow the manufacturer’s instructions. Gel systems need a full cure under the lamp. Air-dry systems need the recommended drying time.
Step 8: File and shape. Use a fine sanding band to shape the nail and smooth the surface. Blend the tip or form area until it is seamless. Be gentle. Fiberglass is thinner than acrylic, so aggressive filing can damage it.
Step 9: Finish. Apply a gel top coat or a high-gloss polish. Cap the free edge. Cure if needed. Apply cuticle oil.
Important Tips for Fiberglass Extensions
Keep layers thin. Fiberglass works best when it is thin. Thick layers look bulky and can lift. Build strength with multiple thin layers, not one thick layer.
Avoid wrinkles in the mesh. Wrinkles create weak points and bumps. Press the mesh flat and smooth it with your brush before it sets.
Keep resin off the skin. Resin on the cuticle or sidewalls will lift. Clean up before curing or drying.
Cap the free edge. Sealing the tip prevents water from getting underneath.
Do not over-file. Fiberglass is strong but thin. Over-filing can cut through the mesh and weaken the extension.
Use quality mesh. Cheap mesh may fray or have uneven weave. Good mesh is fine, consistent, and easy to saturate.
Practice on tips first. Fiberglass application takes practice. Work on fake nails before doing a full set on a client.
Remove properly. If your system is soak-off, file the top coat, soak in acetone, and gently push off. Never peel. If it is a hard resin system, it may need to be filed off.
The Bottom Line
Fiberglass nail extensions are a lightweight, natural-looking alternative to acrylics and hard gels. They offer strength, flexibility, and a thin finish that flatters the natural nail. With the right supplies and a little practice, you can create beautiful extensions that feel comfortable and look effortless. For clients who want length without heaviness, fiberglass is a smart, elegant choice.
Read also: The Complete Guide to Gel Polish Manicures: Application, Differences, Removal, and Trends